
So, you’ve got a woodworking project on your hands, and you know that mastering the art of wood gluing is crucial for its success. Whether you’re building furniture or crafting intricate wooden designs, the strength and durability of your pieces relies heavily on how well you glue them together. In this article, we’ll explore some tried and true wood gluing techniques that will take your woodworking skills to the next level. From choosing the right glue to properly preparing the surfaces, we’ve got you covered. Get ready to elevate your craftsmanship and create stunning woodwork that lasts.

Choosing the Right Glue
When it comes to woodworking projects, choosing the right glue is crucial. The type of wood you’re working with, as well as the requirements of your project, will determine the appropriate glue for the job. Different glues have varying levels of strength, workability, and drying times, so it’s important to consider these factors before making your selection.
Understanding Wood Types
Before diving into the world of glues, it’s important to have a basic understanding of different wood types. Hardwoods, such as oak and maple, are generally denser and require stronger adhesives. Softwoods, like pine and cedar, are less dense and can typically be glued with a wider range of adhesives. Additionally, there are composite woods, like plywood and particleboard, which have their own unique properties and may require specific glues.
Considering Project Requirements
The requirements of your woodworking project will also play a significant role in choosing the right glue. If you’re working on a project that will be exposed to outdoor elements, you’ll need a glue that is waterproof and weather-resistant. On the other hand, if you’re working on a delicate project that requires precision, a glue with a longer open time may be more suitable. Consider factors such as strength, flexibility, and working time to ensure you choose a glue that meets your project’s specific needs.
Exploring Different Glue Types
There are various types of glue available for woodworking projects, each with its own unique characteristics and recommended uses.
- Yellow or Carpenter’s Glue: This is one of the most common types of glue used in woodworking. It’s ideal for general woodworking projects and provides a strong bond. Yellow glue is water-based, easy to clean up, and dries relatively quickly.
- Polyurethane Glue: Known for its strength and versatility, polyurethane glue is a popular choice for both indoor and outdoor woodworking projects. It has excellent bonding capabilities and is waterproof, making it ideal for projects exposed to moisture.
- Epoxy: Epoxy glue is a two-part adhesive that provides an incredibly strong bond. It’s often used for bonding dissimilar materials and can be an excellent choice for projects that require maximum durability and resistance to impacts.
- Cyanoacrylate (CA) Glue: Commonly known as super glue, CA glue is ideal for bonding small parts and intricate details. It sets quickly and forms a strong bond, making it suitable for projects that require instant adhesion.
- Hide Glue: Hide glue is a traditional adhesive that has been used in woodworking for centuries. It offers excellent bonding strength, especially when used on bare, porous wood surfaces. Hide glue is available in both liquid and granular form and can be heated for application.
Taking the time to research and understand the different glue types available will ensure you make an informed decision that will result in a successful woodworking project.
Preparing the Wood Surface
Preparing the wood surface before applying glue is essential for achieving a strong and lasting bond. Proper cleaning, drying, and smoothing of the surfaces will help remove any contaminants and create an optimal surface for the glue to adhere to.
Cleaning and Drying the Surfaces
Before gluing, thoroughly clean the surfaces that will be bonded. Any dirt, dust, or other substances can prevent the glue from properly adhering to the wood. Use a clean cloth or brush to remove any loose particles, and consider using a mild cleaner if necessary.
After cleaning, it’s important to ensure the wood surfaces are completely dry. Moisture can interfere with the effectiveness of the glue, so allow the wood to dry naturally or use a clean, dry cloth to remove any excess moisture.
Sanding and Smoothing
To maximize the bond strength, it’s recommended to sand the surfaces that will be glued. sanding helps remove any rough spots or imperfections, creating a smooth and even surface for the glue to adhere to. Start with a coarse-grit sandpaper to remove any high spots or rough sections, and then progress to finer-grit sandpaper for a smoother finish.
When sanding, make sure to sand with the grain of the wood to avoid creating scratches or gouges. Take your time and apply even pressure to achieve a consistent sanding result across the entire surface.
Removing Old Glue or Finish
If you’re working with wood that has been previously glued or finished, it’s important to remove any remnants of the old adhesive or finish. Old glue can interfere with the bonding of the new glue, while old finishes can create a barrier that prevents proper adhesion.
To remove old glue, carefully scrape it off using a putty knife or scraper. Take caution not to damage the wood surface in the process. If there are any remnants left behind, use a sandpaper or a chemical adhesive remover to eliminate them completely.
For removing old finishes, sanding is usually the most effective method. Start with a coarse-grit sandpaper to remove the majority of the finish, and then switch to finer-grit sandpaper to achieve a smooth, bare surface.
By thoroughly preparing the wood surface, you’ll ensure the glue has the best possible chance to bond effectively and create a strong joint.
Applying the Glue
Once the wood surfaces are properly prepared, it’s time to apply the glue. Applying glue may seem straightforward, but there are a few key considerations to keep in mind to ensure a successful bonding process.
Determining the Right Amount of Glue
One of the most common mistakes when gluing wood is using too much or too little glue. Both scenarios can result in a weak bond and compromise the strength and durability of the joint.
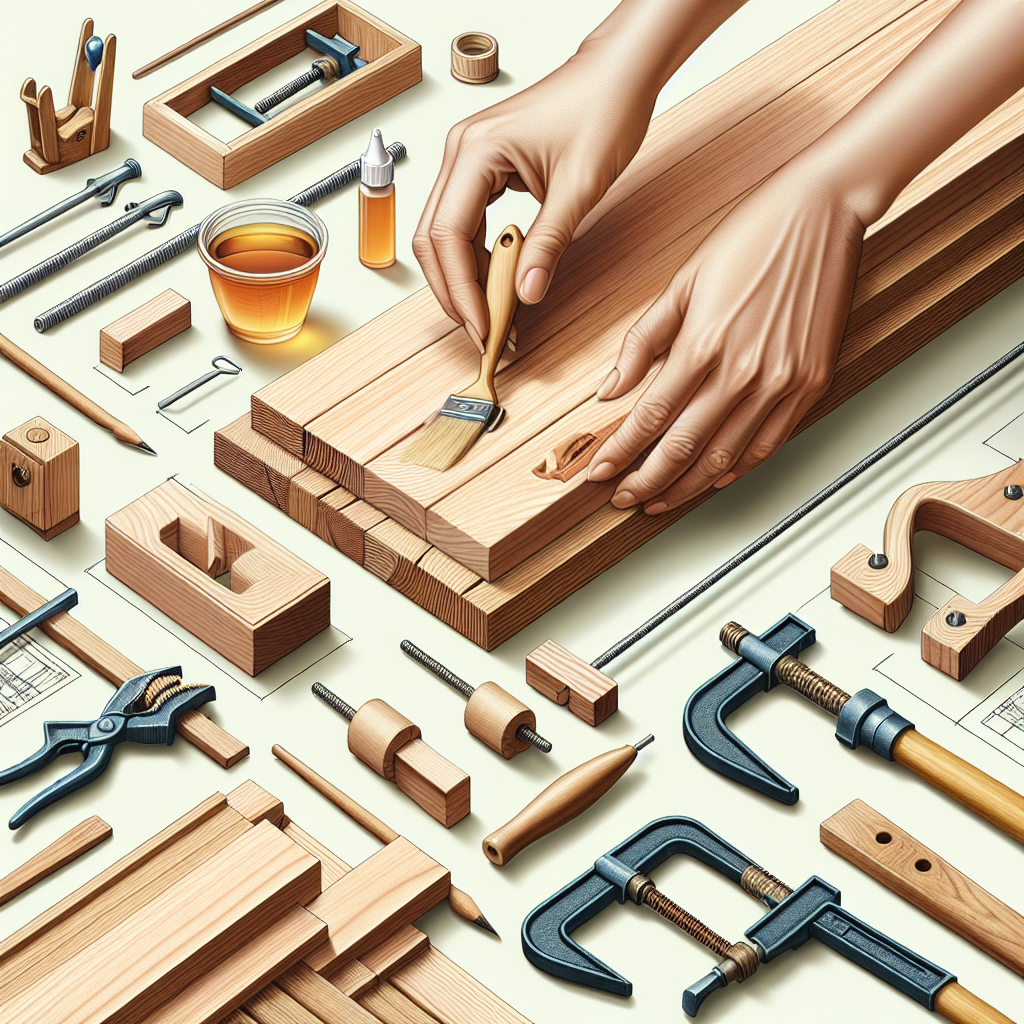
As a general rule of thumb, apply enough glue to fully cover the surface without excessive pooling or oozing. Avoid applying glue directly from the bottle onto the wood, as it can be difficult to control the amount. Instead, squeeze the glue onto a disposable surface, such as a scrap piece of wood or cardboard, and use a brush or spreader to apply a thin and even layer.
Spreading the Glue Evenly
Once you have the appropriate amount of glue, it’s important to spread it evenly across the surface. Uneven glue application can lead to weak spots in the joint and may compromise the overall strength.
Using a brush or spreader, work the glue into the wood grain, making sure the entire surface is covered. Pay extra attention to any joints or areas that require additional strength, such as the ends of boards or butt joints.
Using the Appropriate Glue Applicator
Different woodworking projects may require different glue applicators to ensure precise and efficient glue application. Here are a few common types of glue applicators:
- Brush: A brush is a versatile applicator that works well for spreading glue on large surfaces or for applying glue to intricate details. Choose a brush with bristles that are compatible with the type of glue you’re using.
- Roller: Glue rollers are useful for applying a thin, even layer of glue to large surfaces, such as when laminating wood panels. They can help ensure consistent coverage and minimize excess glue.
- Glue Bottle with Nozzle: Glue bottles with narrow nozzles are great for applying glue to tight or hard-to-reach areas. The narrow opening allows for precise control and reduces the risk of excess glue.
- Glue Gun: Glue guns are commonly used with hot melt adhesives and are ideal for quick bonding applications. They can be particularly useful for small repairs or for attaching small embellishments.
Selecting the right glue applicator will depend on the specific requirements of your project and the type of glue you’re using. Consider factors such as the surface area to be glued, the complexity of the project, and the desired level of precision.
Clamping Techniques
Clamping is an essential step in the gluing process that ensures the wood joints are held together firmly while the glue sets. Proper clamping techniques contribute to stronger and more durable bonds, preventing joint failure over time. Here are some key considerations when it comes to clamping.
Choosing the Right Clamps
The type of clamps you choose will depend on the size and nature of your project. There are a variety of clamps available, each designed for different applications. Common types of clamps used in woodworking include:
- Bar Clamps: These clamps have a long, straight bar that spans across the width of the workpiece, providing even pressure along the entire joint. They are versatile and suitable for a wide range of projects.
- Pipe Clamps: Pipe clamps consist of a length of pipe with adjustable jaws on both ends. They can provide significant clamping force and are particularly useful for larger projects.
- C-Clamps: C-clamps have a shaped frame resembling the letter “C” and are suitable for smaller projects or for applying localized pressure. They can be easily adjusted and provide a secure grip.
- Parallel Clamps: Parallel clamps have jaws that remain parallel to each other, allowing for precise and even pressure distribution. They are ideal for larger projects and provide strong clamping power.
When choosing clamps, consider the dimensions of your workpiece, the required clamping force, and the accessibility of the joint. It’s often helpful to have a variety of clamps on hand to accommodate different project requirements.
Properly Aligning the Wood
Before clamping, make sure the wood pieces are properly aligned and positioned. Misaligned joints can result in poor glue adhesion and weak bonds. Take the time to ensure the joints are flush and fit together snugly before applying glue and clamping.
Using squares, levels, or other alignment tools can help ensure that the joints are properly aligned. Double-check all the angles and edges before moving on to the clamping stage. Taking the time to align the wood correctly will result in stronger and more precise joints.
Applying Adequate Pressure
Applying adequate pressure during the clamping process is crucial for achieving a strong bond. Insufficient pressure can result in gaps between the wood pieces, leading to weak joints. Conversely, applying too much pressure can cause the glue to squeeze out excessively, creating a messy and weakened joint.
As a general guideline, apply enough pressure to close any gaps between the wood but avoid over-tightening. The glue should spread evenly across the joint without excessive squeezing. It’s important to strike a balance between sufficient pressure to ensure a tight bond and avoiding the risk of damaging the wood.
Avoiding Over-Tightening
While it’s important to apply adequate pressure, it’s equally crucial to avoid over-tightening the clamps. Over-tightening can compress the wood fibers excessively, compromising the strength and integrity of the joint.
Keep in mind that some glues require a specific amount of pressure to ensure a proper bond. Refer to the manufacturer’s instructions for the recommended clamping pressure for the specific glue you’re using. It’s a good practice to use a torque wrench or a clamp pressure gauge to monitor and control the clamping force, especially for larger projects.
Be mindful of the wood species you’re working with as well. Different woods have varying levels of hardness and susceptibility to damage from excessive pressure. Taking the time to understand the specific requirements of your project and the properties of the wood will help you avoid over-tightening and achieve optimal clamping results.
Drying and Curing
After the glue has been applied and clamped, proper drying and curing are crucial for achieving strong and durable bonds. Understanding the drying and curing times, creating optimal drying conditions, and ensuring sufficient bond strength are key considerations in this stage.
Understanding Drying and Curing Times
Different types of glue have varying drying and curing times, which can range from a few minutes to several hours or even days. It’s important to consult the manufacturer’s instructions for specific guidance on the glue you’re using.
Drying time refers to the time it takes for the glue to lose its moisture and become tack-free. During this period, the glue may still feel slightly sticky or soft. Curing time, on the other hand, refers to the time it takes for the glue to fully harden and reach its maximum strength. Cured glue will be firm, solid, and capable of withstanding stress.
Factors such as temperature and humidity can affect the drying and curing times of glue. Colder temperatures and higher humidity levels tend to slow down the drying and curing process, while warmer temperatures and lower humidity levels can speed it up. Taking these variables into account will help you plan and allocate sufficient time for the glue to dry and cure properly.
Creating Optimal Drying Conditions
Creating proper drying conditions can significantly impact the quality and strength of the glued joint. Consider the following factors to ensure optimal drying conditions:
- Temperature: The ideal temperature for drying glue is typically around room temperature, between 60°F (15°C) and 75°F (24°C). Extreme temperatures can negatively affect the drying process and compromise the bond strength. Avoid drying glue in direct sunlight or in excessively hot or cold environments.
- Humidity: Glue drying is also influenced by humidity levels. High humidity levels can slow down the drying process, while low humidity levels can speed it up. Aim for a moderate humidity level in the drying area, between 40% and 60%, to ensure consistent and reliable drying results.
- Ventilation: Proper ventilation is important during the drying process to allow moisture to escape. Ensure there is adequate airflow in the drying area to prevent moisture buildup and help the glue cure properly. It’s often helpful to place the glued project in an area with good air circulation or to use fans or air movers to facilitate drying.
By creating optimal drying conditions, you’ll promote efficient glue drying and curing, resulting in stronger and more reliable bonds.
Ensuring Sufficient Bond Strength
Bond strength refers to the ability of the glued joint to withstand stress and maintain its integrity over time. Adequate drying and curing are essential for achieving optimal bond strength.
As a general guideline, it’s recommended to avoid subjecting the glued joint to stress or load until the glue has fully dried and cured. Depending on the type of glue used, this may take several hours or even days. Be patient and allow sufficient drying and curing time to give the glue the best chance to reach its maximum bond strength.
Keep in mind that wood glues typically continue to cure and increase in strength over a few days or even weeks after the initial drying period. While it may be tempting to rush the project, allowing for ample curing time will ensure the strongest possible bond and a more durable finished product.
Fixing Glue Glitches
Even with careful preparation and execution, glue glitches can sometimes occur. Glue stains, excess glue, and failed glue joints are among the common issues woodworkers may encounter during the gluing process. Knowing how to address these glitches can help salvage your project and achieve a satisfactory outcome.
Dealing with Glue Stains
Glue stains can occur when excess glue oozes out of the joint and onto the wood surface. These stains can be unsightly and may affect the final appearance of the project. Quick action is key to effectively remove glue stains.
If the glue is still wet, immediately wipe it away with a damp cloth or sponge. Be careful not to spread the glue further or push it deeper into the wood grain. Once the excess glue is removed, you can lightly sand the area with fine-grit sandpaper to further diminish any visible traces of the stain.
If the glue has dried, it can be more challenging to remove. Consider using a chisel or a scraper to carefully scrape away the dried glue. Take caution not to damage the wood surface in the process. If necessary, lightly sand the area to further blend in the affected spot.
Being mindful of excess glue during the gluing process and promptly addressing any stains can help maintain the aesthetics of your woodworking project.
Removing Excess Glue
Excess glue can not only create unsightly stains but also compromise the quality and strength of the joint. Taking steps to remove excess glue during the gluing process is crucial for ensuring a clean and strong bond.
If you notice excess glue while it’s still wet, use a clean, damp cloth or sponge to carefully wipe it away. Be gentle to avoid spreading the glue further or pushing it deeper into the wood grain. Avoid using excessive water, as it can cause the wood to swell or warp. Once the excess glue is removed, you can continue with the clamping and drying process.
If the excess glue has dried, it can be more challenging to remove. Consider using a chisel or a scraper to carefully scrape away the dried glue. Take caution not to damage the wood surface. Depending on the severity of the excess glue, you may need to do some light sanding to achieve a smooth and flush surface.
Preventing excess glue can be achieved by using the appropriate amount of glue, spreading it evenly, and being mindful of any glue squeeze-out during the clamping process. Taking these preventive measures will help minimize the need for excessive clean-up and ensure a clean and professional finish.
Repairing Failed Glue Joints
Sometimes, despite your best efforts, glue joints may fail. Whether due to weak bond strength, improper alignment, or other factors, failed glue joints can be disheartening. However, with the right approach, they can often be repaired and salvaged.
To repair failed glue joints, the first step is to carefully separate the wood pieces. This can be done by applying gentle pressure and tapping or leveraging the joint with a mallet, chisel, or similar tool. Take care not to further damage the wood during the separation process.
Once the pieces are separated, thoroughly remove any remaining glue from both surfaces. This can be done by scraping with a chisel, sanding, or using a chemical adhesive remover. Ensure that the surfaces are clean, smooth, and free of debris before reapplying glue.
After the surfaces are prepared, apply a fresh layer of glue and reassemble the joint. Use clamps to hold the pieces firmly together while the glue dries and cures. It’s important to follow the same gluing and clamping techniques as before to ensure a strong and reliable bond.
When repairing failed glue joints, it’s crucial to analyze and address the underlying cause of the failure. This may involve adjusting the technique, choosing a different type of glue, or reinforcing the joint with additional measures. By learning from the failure and making the necessary improvements, you can achieve a successful repair and avoid similar issues in the future.
Avoiding Common Mistakes
Wood gluing may seem straightforward, but there are some common mistakes that can compromise the quality and strength of your joints. By being aware of these mistakes and taking steps to avoid them, you can ensure a successful gluing process and achieve superior results.
Not Rushing the Gluing Process
Patience is key when it comes to gluing wood. Rushing can lead to errors, poor alignment, and weak joints. Take the time to properly prepare the wood surfaces, apply the right amount of glue, and ensure accurate alignment of the joints. Rushing through these steps can result in subpar bonds and a project that may not withstand the test of time.
Avoiding Over-Gluing
Using excessive amounts of glue can create messy joints, weaken the bond, and result in prolonged drying and curing times. Remember that the goal is to achieve a thin and even layer of glue on the wood surfaces. Use the appropriate amount of glue necessary for a strong bond without excessive squeezing or pooling. Applying the right amount of glue will not only make the cleanup process easier but also ensure a more efficient drying and curing process.
Maintaining Proper Temperature and Humidity
Temperature and humidity levels play a significant role in the gluing process. Extreme temperatures can affect the glue’s performance, while high humidity can slow down drying and curing times. Aim for moderate room temperature, between 60°F (15°C) and 75°F (24°C), and humidity levels between 40% and 60% to ensure optimal glue performance. Additionally, good ventilation in the drying area will help facilitate proper drying and curing.
By being mindful of these common mistakes and taking a careful and patient approach to the gluing process, you’ll greatly increase the likelihood of achieving strong and durable joints.
Special Considerations for Different Wood Joints
Different wood joints require different gluing techniques to achieve optimal bond strength and joint stability. Understanding the special considerations for each type of joint will help you select the appropriate glue and apply the right techniques.
Butt Joints
Butt joints are one of the simplest and most common joints in woodworking. They involve joining the face-grain ends of two pieces of wood together. To ensure a strong and stable butt joint, follow these guidelines:
- Use a glue with good gap-filling properties to maximize the bond strength.
- Apply glue to both surfaces of the joint, spreading it evenly with a brush or spreader.
- Align the joint accurately and secure it with clamps during drying to prevent any movement.
- Consider reinforcing the joint with dowels, biscuits, or screws for added strength.
Butt joints are commonly used in applications such as box construction, cabinet frames, and simple woodworking projects.
Miter Joints
Miter joints are formed by joining two pieces of wood at a 45-degree angle, creating a clean and seamless look. Here are some tips for achieving strong miter joints:
- Use a glue suitable for end-grain bonding, as miter joints expose end grain, which can be more challenging to bond.
- Apply glue to both the end grain and long grain surfaces, ensuring even coverage.
- Use mitre-specific clamps or band clamps to hold the joint tightly and maintain accurate alignment.
- Reinforcing the joint with splines or biscuits can enhance the joint’s strength and stability.
Miter joints are commonly used in picture frames, trim work, and other applications where a clean, angled joint is desired.
Dado Joints
Dado joints involve joining a board into a groove or channel created in another board. They provide a secure connection and are commonly used for shelving and cabinetry. Here’s what you need to consider when gluing dado joints:
- Apply an even layer of glue to the dado groove and the mating surface of the board.
- Use a dowel or brush to work the glue into the dado to ensure full coverage.
- Slide the mating board into the dado joint, ensuring a snug fit.
- Clamping the joint with bar clamps or parallel clamps will help maintain alignment and ensure a strong bond.
Dado joints require precise cutting and accurate glue application to achieve a seamless and stable connection.
Dovetail Joints
Dovetail joints are a traditional joint known for their strength and durability. They are commonly used in drawer construction and furniture making. Here are some considerations when gluing dovetail joints:
- Apply glue to both the tails and the pins of the dovetail joints, ensuring full coverage.
- Use a small brush or spreader to spread the glue evenly in the dovetail recesses.
- Assemble the joint by sliding the tails into the corresponding pins, making sure they fit tightly.
- Clamp the joint using a vice or specialized dovetail clamps to hold it securely during drying.
Properly fitting and gluing dovetail joints will result in an incredibly strong and visually appealing joint.
Finger Joints
Finger joints, also known as box joints, are a type of corner joint that provides a large gluing surface for added strength. They are commonly used in boxes, drawers, and small woodworking projects. Consider the following when gluing finger joints:
- Apply glue to both the fingers and the mating surfaces, ensuring full coverage.
- Use a brush or spreader to work the glue into the finger joints for maximum bonding.
- Assemble the joint by interlocking the fingers, making sure they fit snugly together.
- Clamp the joint with bar clamps or band clamps to maintain alignment and achieve a strong bond.
Finger joints require precise cutting and accurate glue application to create a tight and secure joint.
Understanding the unique considerations of each wood joint will help you select the appropriate glue and employ the most effective techniques to achieve strong and stable connections.
Gluing Techniques for Specific Woodworking Projects
Different woodworking projects may require specific gluing techniques to achieve optimal results. Here are some common project types and the recommended gluing techniques:
Gluing Panels and Boards
Gluing panels and boards involves joining multiple pieces of wood together to create larger surfaces. To ensure a strong and seamless panel or board, follow these guidelines:
- Apply glue to both surfaces to be glued together, spreading it evenly and ensuring full coverage.
- Align the edges of the boards accurately, minimizing any gaps or misalignment.
- Consider using biscuits, dowels, or splines for added alignment and strength.
- Use bar clamps or pipe clamps to secure the boards tightly while the glue dries.
Gluing panels and boards is commonly used in tabletops, doors, and other large-scale woodworking projects.
Edge and Face Gluing
Edge and face gluing involves joining narrow edges or larger faces of wood together to create wider panels or laminations. Here’s how to achieve a strong edge or face glue joint:
- Apply glue to both edges or faces to be glued together, spreading it evenly and ensuring full coverage.
- Align the edges or faces accurately, minimizing any gaps or misalignment.
- Use bar clamps or parallel clamps to apply even pressure along the length of the joint.
- Consider using cauls or scrap wood cauls to distribute the clamping pressure evenly and prevent bowing or warping.
Edge and face gluing is commonly used in tabletops, countertops, and other applications that require wider boards or panels.
Laminating Wood
Laminating involves layering thin strips or veneers of wood together to create a thicker and stronger wood surface. Here are some tips for successful wood lamination:
- Apply glue to both surfaces to be laminated, spreading it evenly and ensuring full coverage.
- Work the glue into the wood grain to maximize bonding.
- Align the strips or veneers accurately, minimizing any gaps or misalignment.
- Use bar clamps or pipe clamps to apply even pressure and maintain tight contact between the layers.
Laminating wood is commonly used in curved furniture parts, musical instruments, and decorative surfaces.
Assembling Furniture
Assembling furniture involves joining various wood components to create a functional and stable piece. Here are some considerations when gluing furniture components:
- Apply glue to the mating surfaces, ensuring even coverage and complete glue coverage.
- Use dowels, biscuits, or other joinery techniques to reinforce the joints and ensure proper alignment.
- Consider using specialized furniture clamps or strap clamps to apply even pressure and maintain alignment during the gluing process.
- Allow extra drying and curing time to ensure the joints are strong and stable before subjecting the finished piece to regular use.
Assembling furniture requires careful planning, precise gluing techniques, and a strong understanding of joinery methods.
Strengthening Glued Joints
While gluing alone can provide strong and durable joints, there are additional measures you can take to strengthen glued connections, especially in high-stress or load-bearing applications. Reinforcements, mechanical fasteners, and wood fillers or putty can enhance the strength and performance of your glued joints.
Using Reinforcements
Reinforcing a glued joint involves adding additional supporting elements to enhance the joint’s strength and stability. Here are some common types of reinforcements:
- Dowels: Dowels are wooden pegs inserted into predrilled holes in the wood. They provide increased strength and alignment to the joint. Dowels are commonly used for reinforcing butt joints, edge joints, and face joints.
- Biscuits: Biscuits are small, oval-shaped wooden plates that are inserted into slots created in the wood. They add extra strength and alignment to edge and face joints. Biscuits are commonly used for joining wide boards and larger panels.
- Splines: Splines are thin strips of wood inserted into slots or grooves cut into the wood. They provide additional strength and stability, especially in mitre and edge joints. Splines can also be decorative elements that add visual interest to the project.
- Reinforcing Plates: Reinforcing plates, such as metal or wood brackets, can be attached to the joint to help distribute load and provide additional support. They are often used in high-stress or load-bearing applications, such as furniture frames or structural elements.
Reinforcements can significantly increase the overall strength and durability of glued joints, especially in situations where the joint will be subjected to heavy use or stress.
Adding Mechanical Fasteners
In addition to glue, mechanical fasteners can be used to reinforce glued joints and provide extra strength. Here are some common types of mechanical fasteners:
- Screws: Screws can be used in conjunction with glue to add strength and rigidity to the joint. Pre-drill pilot holes to ensure the wood doesn’t split, and countersink the screw heads to create a flush surface.
- Nails: Nails are often used for temporary or non-permanent joints. They provide quick and simple reinforcement but may not offer the same level of strength as screws or other fasteners.
- Wooden Dowels: Wood dowels can be used as both reinforcement and decorative elements. They are inserted into pre-drilled holes and glued into place to add strength and stability to the joint.
When using mechanical fasteners, it’s important to consider the overall design and aesthetics of your project. Choose fasteners that complement the wood and ensure they are properly inserted and secured to maximize their effectiveness.
Applying Wood Fillers or Putty
Wood fillers or putty can be used to fill gaps, cracks, or imperfections in the wood surface, creating a more seamless and visually appealing joint. They can also help reinforce the joint by providing additional structural support. Here are some considerations when using wood fillers or putty:
- Select a filler or putty that matches the color and grain of the wood for a natural and inconspicuous repair.
- Apply the filler or putty to clean, dry surfaces, ensuring it fills the gaps or imperfections completely.
- Smooth and level the filler or putty using a putty knife or a similar tool, removing any excess.
- Sand the repaired area once the filler or putty has fully dried to achieve a consistent and seamless finish.
Wood fillers or putty can be particularly useful in repairs, restorations, or projects that involve joining different wood species or sections with varying grain patterns.
Reinforcing glued joints with reinforcements, mechanical fasteners, or wood fillers can add an extra level of strength, durability, and stability to your woodworking projects.
By following these comprehensive wood gluing techniques, you’ll be well on your way to mastering the art of effective wood bonding. Whether you’re a beginner or an experienced woodworker, taking the time to understand and apply these principles will contribute to the success and quality of your woodworking projects. Remember to choose the right glue, prepare the wood surfaces properly, apply the glue with care, use appropriate clamping techniques, allow adequate drying and curing time, and address any glue glitches that may arise. With practice and attention to detail, you’ll be able to achieve strong, seamless, and long-lasting wood joints that will stand the test of time.