In this article, you will discover a detailed step-by-step guide that will help you achieve a professional finish when working with wood. From preparing the surface to applying the perfect coat of finish, we will guide you through the entire process. Whether you are a woodworking enthusiast or a seasoned professional, this guide is packed with valuable tips and techniques to preserve the beauty of wood and achieve a flawless finish every time. So, grab your tools and get ready to enhance the natural elegance of wood in your next project!
Choosing the Right Wood
Consider the project requirements
Before starting any woodworking project, it’s essential to consider the specific requirements of the project. Think about what the finished item will be used for, how it will be exposed to different elements, and any desired aesthetics. For example, if you are building outdoor furniture, you will need a wood type that is durable and weather-resistant. On the other hand, if you are crafting a delicate piece of home decor, you may want to choose a wood that has an attractive grain pattern.
Research different wood types
Once you have determined the project requirements, take the time to research different types of wood that are suitable for your intended use. Each type of wood has its own unique characteristics that can affect its appearance, strength, and durability. Consider factors such as hardness, grain pattern, moisture resistance, and ease of working with the wood. Websites, books, and online forums can be great resources to learn about different wood types and their suitability for various projects.
Evaluate the cost and availability
Cost and availability are important factors to consider when choosing the right wood for your project. Some wood species may be more affordable and readily available in your area, while others may be more exotic and expensive. You should also consider the size and dimensions of the wood you need, as larger pieces may be harder to find and more costly. By weighing these factors against your project requirements, you can make an informed decision that balances both quality and affordability.
Preparing the Wood
Inspecting for defects
Before starting the finishing process, thoroughly inspect the wood for any defects or imperfections. Look for knots, cracks, splits, or any other visible issues that could affect the final result. It’s essential to address these defects before applying any finishes to ensure a smooth and even surface. Depending on the severity of the defects, you may need to fill them with wood filler or consider replacing the damaged sections altogether.
Sanding the wood surface
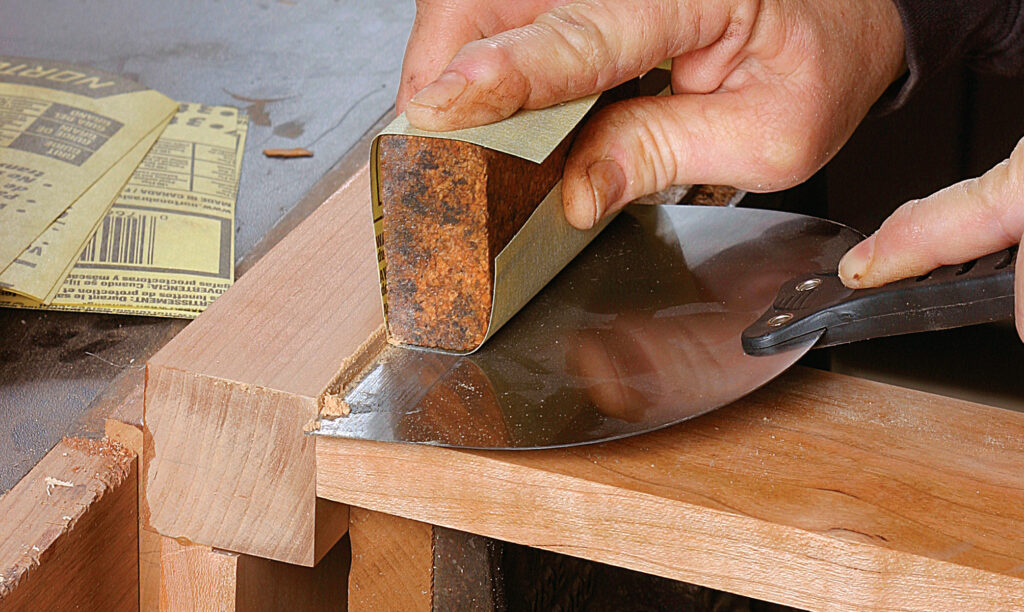
One of the most crucial steps in preparing the wood for finishing is sanding. Sanding helps to create a smooth surface by removing any roughness or imperfections. Start with a coarse-grit sandpaper to remove any large blemishes or uneven areas, and gradually work your way up to a finer-grit sandpaper for a smooth finish. Sand in the direction of the wood grain to avoid creating scratches or swirl marks. Remember to also sand the edges and corners to ensure a consistent appearance on all surfaces.
Applying wood conditioner
Wood conditioner is an optional but highly recommended step, especially if you are working with softwoods or porous woods such as pine or oak. Wood conditioner helps to seal the wood, preventing uneven absorption of the finish. This ensures a more even and professional-looking result. Apply the wood conditioner following the manufacturer’s instructions, allowing it to soak into the wood for the recommended amount of time before proceeding with the finish.

Selecting the Appropriate Finish
Understanding different types of finishes
When it comes to wood finishes, there are numerous options available, each with its own advantages and characteristics. Some common types of finishes include polyurethane, varnish, lacquer, shellac, and oil-based finishes. Each finish has distinctive properties in terms of durability, sheen, and application method. It’s important to understand the pros and cons of each type to choose the most suitable finish for your project.
Considering the desired outcome
The desired outcome plays a significant role in selecting the appropriate finish. Different finishes can create diverse appearances on the wood surface, ranging from a natural matte finish to a glossy, reflective sheen. Consider the overall style and aesthetic you want to achieve, as well as how the finished piece will complement its surroundings. For instance, a rustic-style piece may benefit from an oil-based finish that enhances the wood’s natural look, while a modern piece may benefit from a high-gloss lacquer finish for a sleek and contemporary appearance.
Matching the finish with the wood type
It’s essential to consider how the chosen finish will interact with the wood type you have selected. Some finishes work better with certain wood species due to differences in absorbency, color enhancement, or compatibility. For example, some finishes may darken the wood, while others may enhance the natural color or grain pattern. It’s recommended to test the finish on a small, inconspicuous area of the wood before applying it to the entire project to ensure compatibility and the desired result.
Applying the Finish
Cleaning the wood surface
Before applying the finish, ensure that the wood surface is clean and free from any dust or debris. Use a soft cloth or tack cloth to remove any particles that may interfere with the finish application. Cleaning the wood surface thoroughly will help to achieve a smoother and more even finish.
Applying the first coat
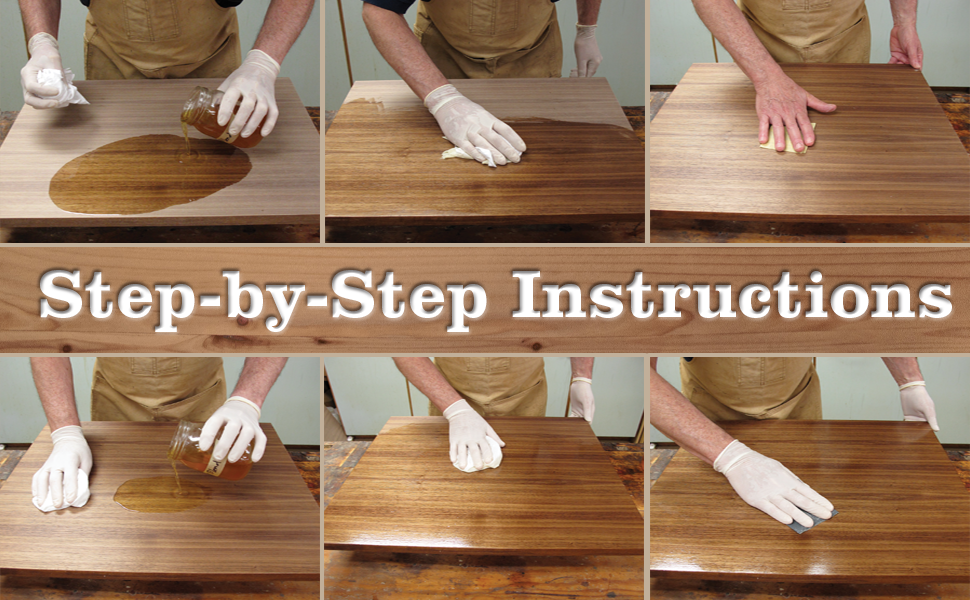
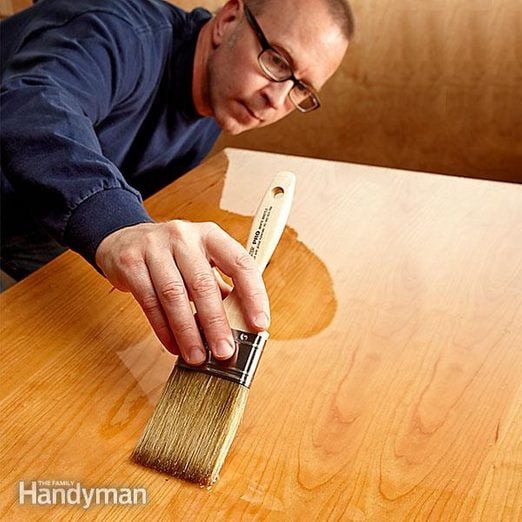
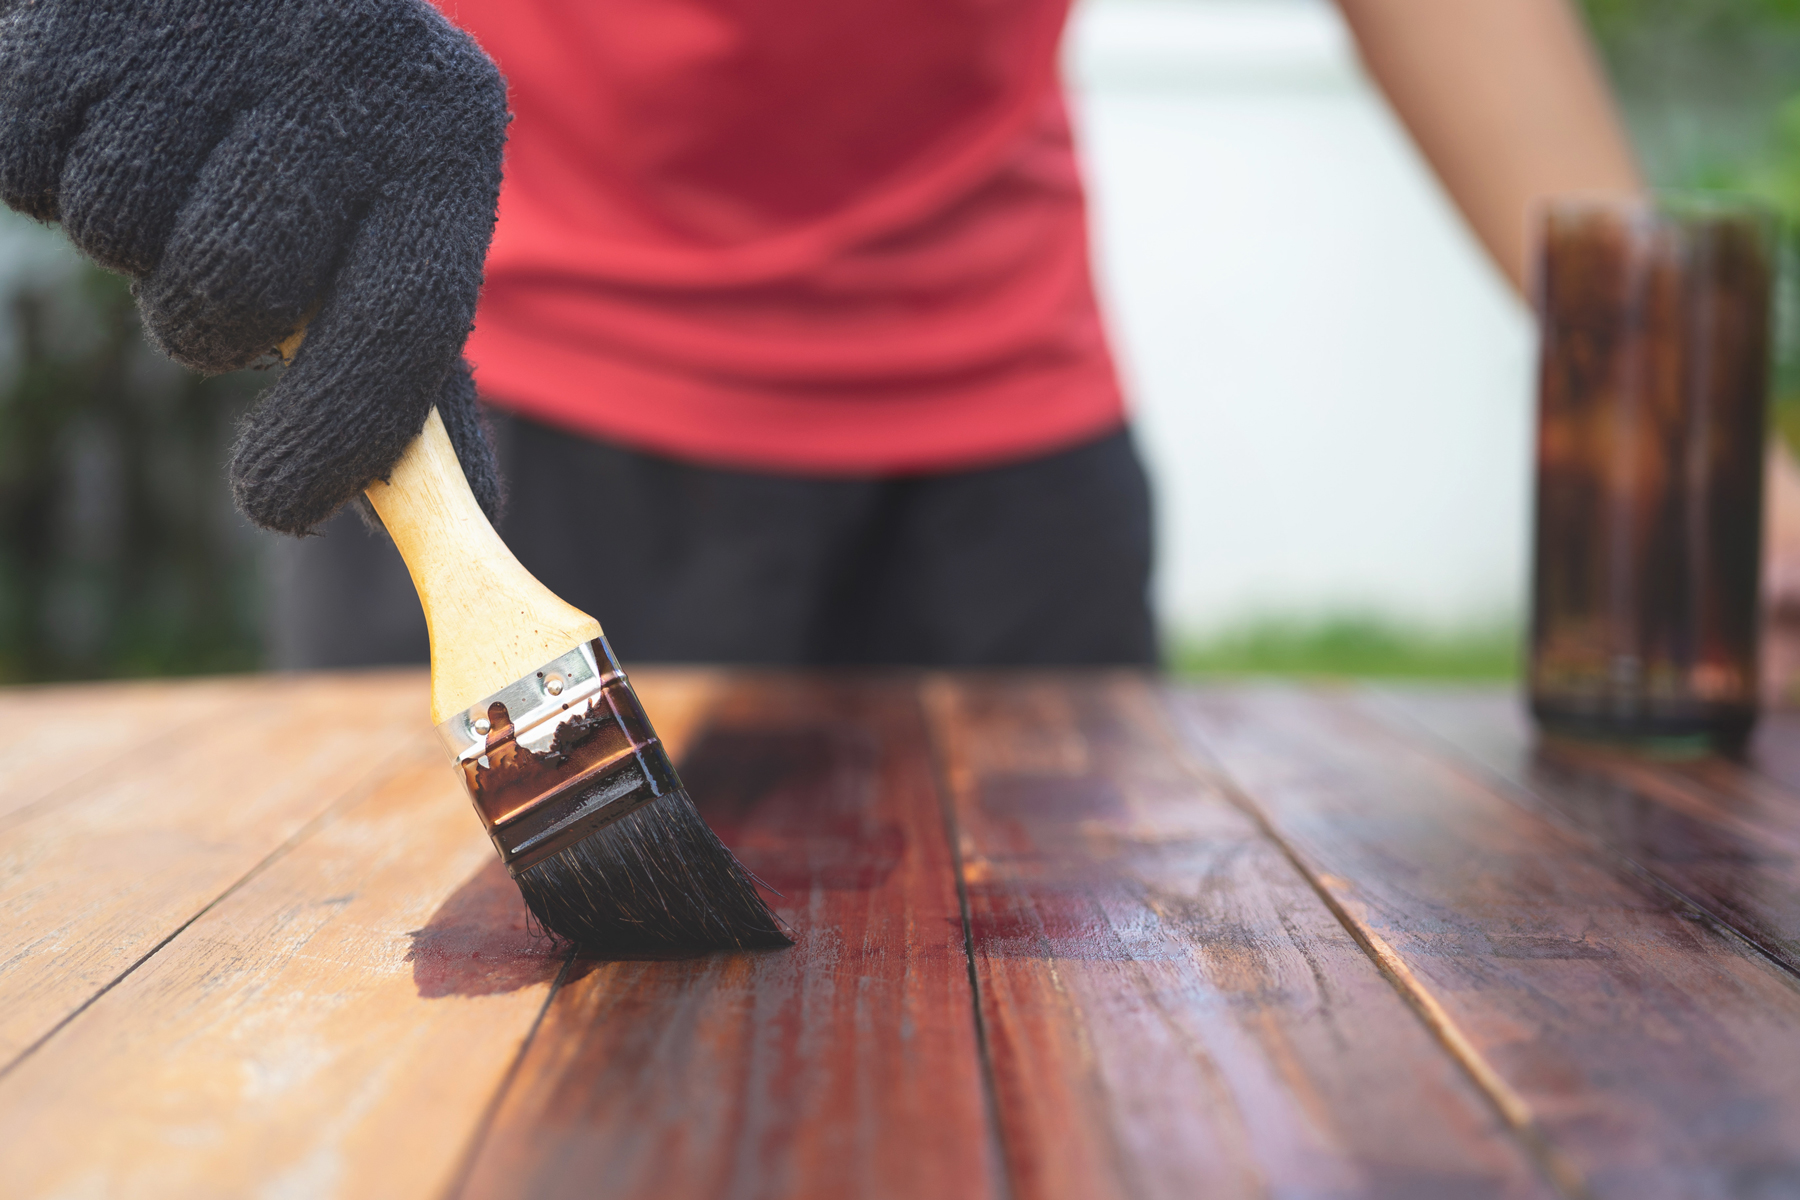
When applying the first coat of finish, it’s important to follow the manufacturer’s instructions carefully. Use a brush, roller, or sprayer, depending on the type of finish and the desired application method. Apply the finish in thin and even layers, working in the direction of the wood grain. Take care to avoid applying too much finish, as this can lead to drips, runs, or uneven drying. Allow the first coat to dry fully before applying subsequent coats.
Sanding between coats
To achieve the best results, it’s recommended to sand the wood surface between coats of finish. This helps to achieve a smoother finish and allows subsequent coats to adhere better. Use a fine-grit sandpaper or sanding block to lightly sand the surface, being careful not to sand through the previous layer of finish. Wipe away any dust with a clean cloth before applying the next coat.

Achieving Smooth and Even Finish
Buffing the final coat
Once all the desired coats of finish have been applied and have cured fully, you can achieve a smooth and even finish by buffing the surface. Use a clean, soft cloth or a buffing pad attached to a power tool to gently buff the finish in circular motions. This helps to remove any minor imperfections, such as tiny dust particles or brush marks, and creates a polished appearance.
Using fine-grit sandpaper for touch-ups
If you notice any imperfections or uneven spots in the finish after buffing, you can perform touch-ups using fine-grit sandpaper. Use a gentle touch and sand the problem areas lightly until they blend in with the surrounding finish. Take care not to sand through the layers or damage the wood underneath.
Applying varnish or sealer
To further protect and enhance the finished wood surface, consider applying a varnish or sealer as a final step. Varnish or sealer adds an additional layer of protection against moisture, UV rays, and everyday wear and tear. Apply the varnish or sealer according to the manufacturer’s instructions, making sure to cover all exposed surfaces evenly. Allow the product to dry completely before using or exposing the finished wood to any stress or elements.
Protecting the Finished Wood
Using protective coatings
To extend the lifespan and beauty of your finished wood, it’s important to use protective coatings such as wax or polyurethane. These coatings form a barrier between the wood and its environment, guarding against scratches, spills, and fading. Regularly reapply the protective coatings as needed, following the manufacturer’s instructions.
Avoiding direct sunlight exposure
Direct sunlight can cause the wood and its finish to fade and deteriorate over time. To protect your finished wood, avoid placing it in direct sunlight or use window coverings such as blinds or curtains to reduce the exposure. If unavoidable, consider using UV-filtering glass or applying a UV-protective coating to the finish.
Regularly cleaning and maintaining the finish
Regular cleaning and maintenance are essential for preserving the beauty of your finished wood. Use a soft, lint-free cloth or a vacuum with a soft brush attachment to remove any dust or debris regularly. Avoid using harsh chemicals or abrasive cleaners that can damage the finish. Instead, opt for recommended wood cleaners or mild soap and water solutions. Additionally, be mindful of any spills and clean them up promptly to prevent staining or damage to the finish.

Dealing with Common Issues
Fixing brush or roller marks
If you notice brush or roller marks in the finish, you can fix them using a technique called wet sanding. Wet sanding involves sanding the affected area with a fine-grit sandpaper soaked in water or lubricant. Gently sand the marks until they blend in with the surrounding finish, taking care to maintain an even pressure and avoiding sanding through the layers.
Repairing scratches or dents
Minor scratches or dents in the finish can be repaired using touch-up products specifically designed for this purpose. These products come in various forms, such as fillers, markers, or crayons, and are available in different wood tones. Match the product to the color of your finished wood, and carefully fill or color in the scratch or dent according to the product instructions. Afterward, use a clean cloth to wipe away any excess material.
Removing bubbles or blisters
If you encounter bubbles or blisters in the finish, you can typically remove them by sanding and refinishing the affected area. Use a fine-grit sandpaper to sand down the bubbles or blisters until they are level with the surrounding finish. Clean the sanded area thoroughly, and then reapply the finish following the previous steps outlined in the article.
Revitalizing Old Finishes
Removing old finish
If you have an old piece of wood furniture or decor with a worn-out finish, you may need to remove the old finish before applying a new one. One method for removing old finish is to use a chemical stripper. Apply the stripper according to the manufacturer’s instructions, and then gently scrape or wipe away the softened finish. It’s important to work in a well-ventilated area and use appropriate safety gear when working with chemical strippers.
Repairing damaged wood
Before applying a new finish to an old piece of wood, it’s essential to address any damaged areas. Repair cracks, splits, or missing pieces by using wood glue, fillers, or replacement parts as needed. Allow the repaired areas to dry or cure fully before proceeding with the finishing process.
Applying new finish
After removing the old finish and making any necessary repairs, you can apply a new finish to revitalize the wood’s appearance. Follow the steps outlined in the previous sections of this article to prepare the wood, select an appropriate finish, and apply it to achieve a professional and refreshed look.

Understanding Environmental Impact
Choosing eco-friendly finishes
In today’s environmentally conscious world, it’s important to consider the environmental impact of the finishes we use. Opt for finishes that are labeled as eco-friendly or contain low volatile organic compounds (VOCs). These finishes have fewer harmful emissions and are safer for both your health and the environment. Look for water-based finishes and natural oils or waxes as alternatives to traditional solvent-based finishes.
Properly disposing of waste
When working with wood finishes, it’s important to dispose of any waste materials properly. Follow local regulations and guidelines for disposing of paint, solvents, and other finish-related products. Some communities offer recycling or hazardous waste disposal programs that accept these types of materials. By disposing of waste responsibly, you contribute to a cleaner and healthier environment.
Reducing VOC emissions
Volatile organic compounds (VOCs) are chemicals found in many traditional wood finishes that can be released into the air during and after application, contributing to air pollution and potential health risks. To reduce VOC emissions, choose low or zero VOC finishes. Additionally, work in a well-ventilated area or use proper respiratory protection when applying finishes that contain VOCs.
Seeking Professional Help
Identifying when to hire a professional
While many woodworking projects can be accomplished on your own, there may be instances where it is wiser to seek professional help. If you are unfamiliar with the finishing process, have a complex or large-scale project, or simply want the assurance of professional expertise, consider hiring a professional finisher. They have the necessary skills, tools, and experience to achieve exceptional results, saving you time and potential frustrations.
Researching reputable finishers
When selecting a professional finisher, it’s crucial to research and find a reputable and reliable individual or company. Look for recommendations from friends, family, or other trusted sources. Read reviews and testimonials online to gauge their previous clients’ satisfaction levels. Additionally, consider their level of experience, portfolio of past work, and any certifications or training they have received.
Requesting cost estimates
Before committing to a professional finisher, it’s important to request cost estimates for your project. Ask for detailed breakdowns of the cost, including labor, materials, and any additional fees. This will allow you to compare different options and make an informed decision based on your budget and the value offered. Remember to also inquire about the estimated timeline for completion and any guarantees or warranties that may be provided.
By following this step-by-step guide to professional finishing, you can ensure that your woodworking projects are not only visually appealing but also well-protected and long-lasting. Whether you choose to tackle the process on your own or seek professional assistance, investing time and effort into finishing your wood correctly will undoubtedly yield impressive results. So gather your tools, select the perfect wood, and let your creativity shine as you embark on your finishing journey.


